Mastering Photoshop: Unknown Tricks and Time-Savers

Layers Selection
Sifting through nests of layer sets to find the layer you need quickly becomes tiresome. Luckily, there are a number of ways to select layers more intuitively. Using the Move tool (V), you can Command + click on the canvas to select the uppermost layer with pixel data located directly below the mouse. If your layers are grouped within layer sets, this action may have selected the entire folder. You can change this behavior to select the actual layer by using the Auto-select drop-down in the Move tool’s property bar
Sorting
Sorting layers with the mouse can be clumsy and slow. A few shortcuts speed up the organizing. Command + [ and Command + ] move the selected layer up or down one position in the stack. If multiple layers are selected, they’ll move relative to the uppermost or bottommost layer. Pressing Command + Shift + [ or Command + Shift + ] brings the selected layer to the top or bottom of its current layer group. If the layer is already at the top or bottom of the layer group, it jumps to the top or bottom of the parent layer group.
Viewing
Option + clicking the eye icon of a layer is a commonly known way to hide or show all other layers. There is also a way to expand and collapse layer groups: by Command + clicking the arrow next to the layer group, you can close or expand all other layer groups; this does not work on nested layer groups. Alternatively, right-clicking the arrow gives you a menu to perform the same actions; but this will work on nested layer groups.
Duplicating
There are a number of ways to duplicate data from one layer to another. Duplicating an entire layer is as simple as pressing Command + J. If a selection is active, you can use the same shortcut (Command + J) to create a new layer based on the selected area of the original layer. Pressing Command + Shift + J with a selection creates a new layer while cutting the data from the original layer. Holding Option while pressing one of the arrow keys allows you to duplicate the current layer and nudge it by 1 pixel. Holding Shift and Option nudges the new layer by 10 pixels.
Brushes Shape and Size
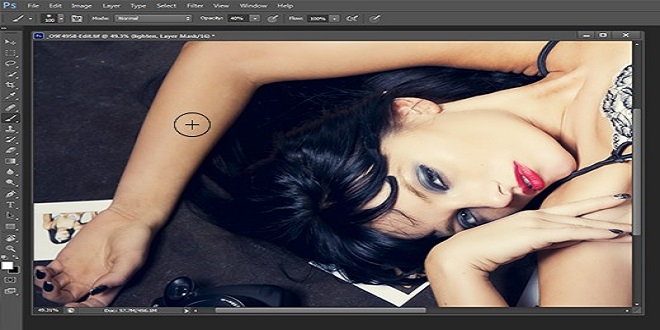
Being able to quickly adjust the brush tool is crucial to getting a swift workflow. Many know about using [ and ] to decrease and increase the brush’s diameter, as well as Shift + [ and Shift + ] to decrease and increase the brush’s hardness. However, CS4 introduced an even more intuitive way to do this. By holding Control + Option and dragging on the canvas, you can change the brush’s diameter with a visual aid. Control + Command + Option and dragging gives you control of the brush’s hardness.
Opacity, Flow and Mode
The opacity of the brush tool can be quickly tweaked using the number keys: 3 = 30%; 3 + 5 = 35%; 0 + 3 = 3%; 0 = 100%. Holding Shift when inputting the numbers sets the flow of the tool. Note that if Airbrush mode is on, these two shortcuts swap (i.e. holding Shift controls opacity instead of flow). You can toggle Airbrush mode on and off using Option + Shift + P.
Summary
Hopefully, reading this has taught you a few new tricks and uncovered for you some of the more obscure options within Photoshop. While memorizing shortcuts can be a chore, integrating them into your daily workflow saves you an incredible amount of time.


